


RandoCartes — managing services
The page for managing services is displayed when you click on the Service settings option in the main menu when the map is displayed.
It will look something like this:
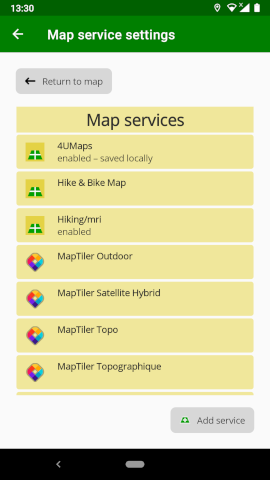
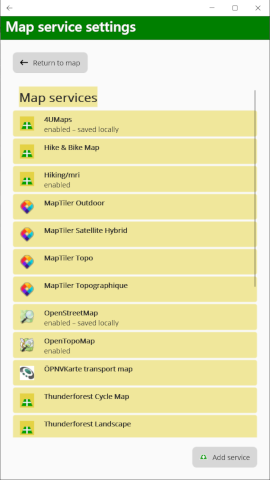
The list shows the services that are available to the application. Some services have a specific icon, others where the supplier has not created an icon, have a generic one.
The list is divided into two sections. At the top, “Map services” are services that display a complete stand-alone map. After these are “Map overlays” which are map services which have a transparent background and only show certain features. They are designed to be displayed over the top of a normal map service.
Under the name of each service is an indication of its state. Only enabled services will apear in the Map service selector above the map.
You can change the settings of a service by clicking on that service. The settings display will look something like this:
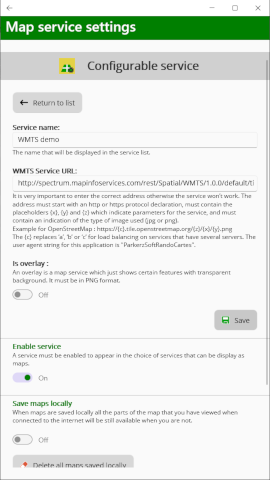
General settings for a service
You can change the settings of a service by clicking on that service. The settings display will look something like this:
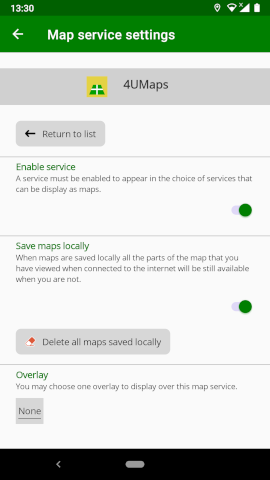
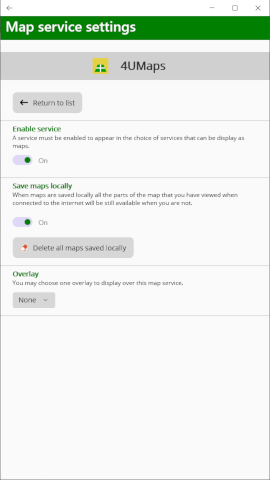
These settings are common to all services:
Enable service — this setting indicates if the service is to appear in the Map service selector above the map. You can disable a service here if you think you will never want to use it. Nothing is deleted by disabling a service so you can always enable it again later.
Map overlays can never be selected as a map, so this option is not shown for them.
Save maps locally — if this setting is disabled any part of a map downloaded will not be saved for later use and will need downloading again if you want to redisplay the same part of the map. By enabling this option, map display will be more fluid once a part of the map has been loaded once. It also allows the map to be displayed later when no internet connection is available.
Be careful though, since some services forbid you from stocking their maps locally.
Delete all maps saved locally — if you press this button you can delete all locally saved maps. This can be useful to free up space on your device, or also to allow new versions of the map to be loaded.
Overlay — for main map services you can choose an overlay that will always be displayed over the base map. When you click on the option, a list of available overlays is shown and you can choose a single one to be displayed. This allows you to include information on the resulting map that is not included in the base map service.
Services requiring a key
Some services require a key to be supplied before they can be used. For these services an extra option Map service key will be displayed. Instructions are included as to how you can obtain the key and you will need to follow these and then enter the key in the appropriate box and save it before the service can be used.
Adding a service
You can add other services to the application if they follow the WMTS standard.
To do so, click on the Add service button beneath the list of services. You will be asked to give details of the service you wish to add.
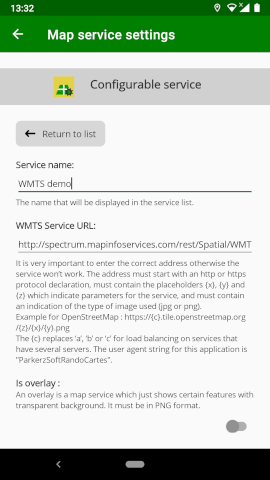
Service name is the name that will be shown when you have to choose a service. Give it a unique name.
WMTS Service URL is the address for the service. If the URL you provide is not correct, the service will not work, so you must carefully check the value you provide.
The URL must start with a protocol indication (http or https), must contain the three values {z} (to indicate the tile matrix), {x} (to indicate the tile column) and {y} (to indicate the tile row), and must also indicate the type of image file served (PNG or JPEG).
The URL should look something like this:
https://server-address.com/path/{z}/{x}/{y}.png
Is overlay — Select this option if the map service has a transparent base and is designed to be shown in the foreground of other maps. When this option is selected, only URLs for PNG file formats are allowed.
When you have entered the required information, you must click on Save to save it.
After the service has been created, the options described above for all services will be displayed so that you can configure the service as you require.