


RandoCartes — managing points of interest
Note: Points of interest cannot be created using this page. For creating points of interest see The map.
The page for managing points of interest is displayed when you click on the Points of interest option in the main menu when the map is displayed.
It will look something like this:
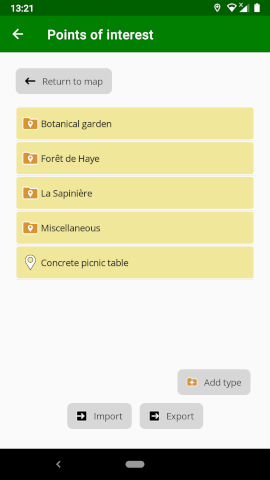
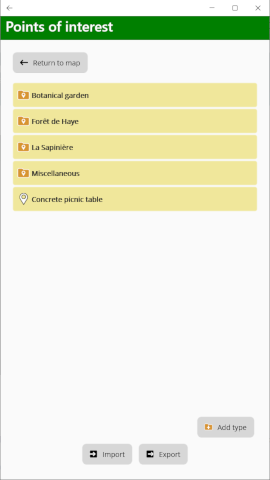
The displayed list can contain two types of item:
Items with a folder icon indicate a type that has been associated with different points of interest. You can click on it to see the points of interest associated with the type.
Items with a pointer icon are points of interest. You can click on them to see the details of the point of interest.
Point of interest details
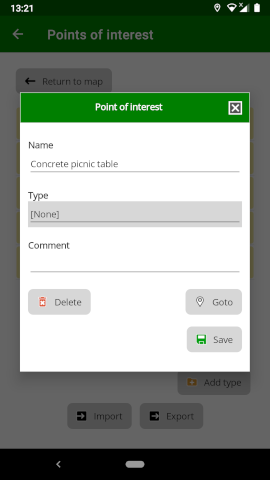
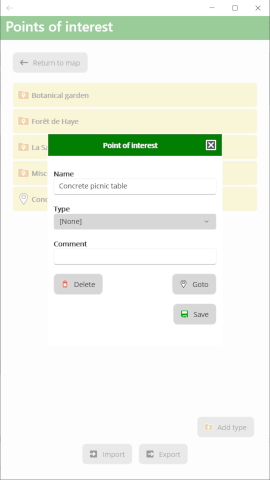
When you click on a point of interest, you can modify the details of it:
The name can be anything you want, it doesn’t have to be unique.
If you change the type of the point of interest (by selecting from the list) the point will be removed from the current list, but you can find it again by displaying the list for the type that was selected.
The comment is optional. It allows you to further describe the point with text that is not included in the name.
The following actions may be made on a point of interest:
Delete — delete the point of interest. You will be asked to confirm this action before it is carried out. The point will be deleted permanently.
Goto — the window will be closed so that the map is shown centred on the point of interest.
Save — close the window after saving modifications.
Actions
The available actions at the bottom of the screen are different according to whether the displayed list is of points of interest with a type or not. These actions are described below.
Import points of interest
The Import button is used to import points of interest from a GPX file. It is always available but the result of the import will be different if points of interest of a given type are displayed or not. When the Import button is pressed in the main list (no type) the type of each point in the imported file will be respected and the points will be assigned each to the type given in the file. Those with no type will be left in the main list. If however, the Import button is pressed when the points for a given type are already displayed, all the imported points will be assigned to the displayed type.
When you press the Import button you will be presented with a list of files available for import. This list will differ according to your device, but you can navigate around your device until you find a GPX file to import. For example, if you have downloaded a GPX file from the web in a browser you can navigate to the downloaded files directory and select the file. The file name must end in .gpx to be accepted.
Once selected, the file will be imported into the application and you will see the points of interest under the appropriate list.
Export points of interest
This option allows you to save all the points of interest in the displayed list as a GPX file outside of the application. You will be presented with a screen allowing you to select where to save the file and what name to give it. The file will then be available for other applications that can read GPX files.
Add type
This button allows you to create a new type (like a folder for grouping points of interest). When you click on it you will be asked for the name of the new type and the type will be added to the list. This option is only available in the main list — you cannot create a type when the displayed list is already a type.
Delete type
This button, which is only available when the displayed list is for a type, allows you to delete all of the displayed points of interest as well as the type itself. You will be asked for confirmation, since it is not possible to recover the list once it has been deleted.
Rename type
This button, which is only available when the displayed list is for a type, allows you to rename the type of the current list. Once the new name has been entered, the list will be renamed.